

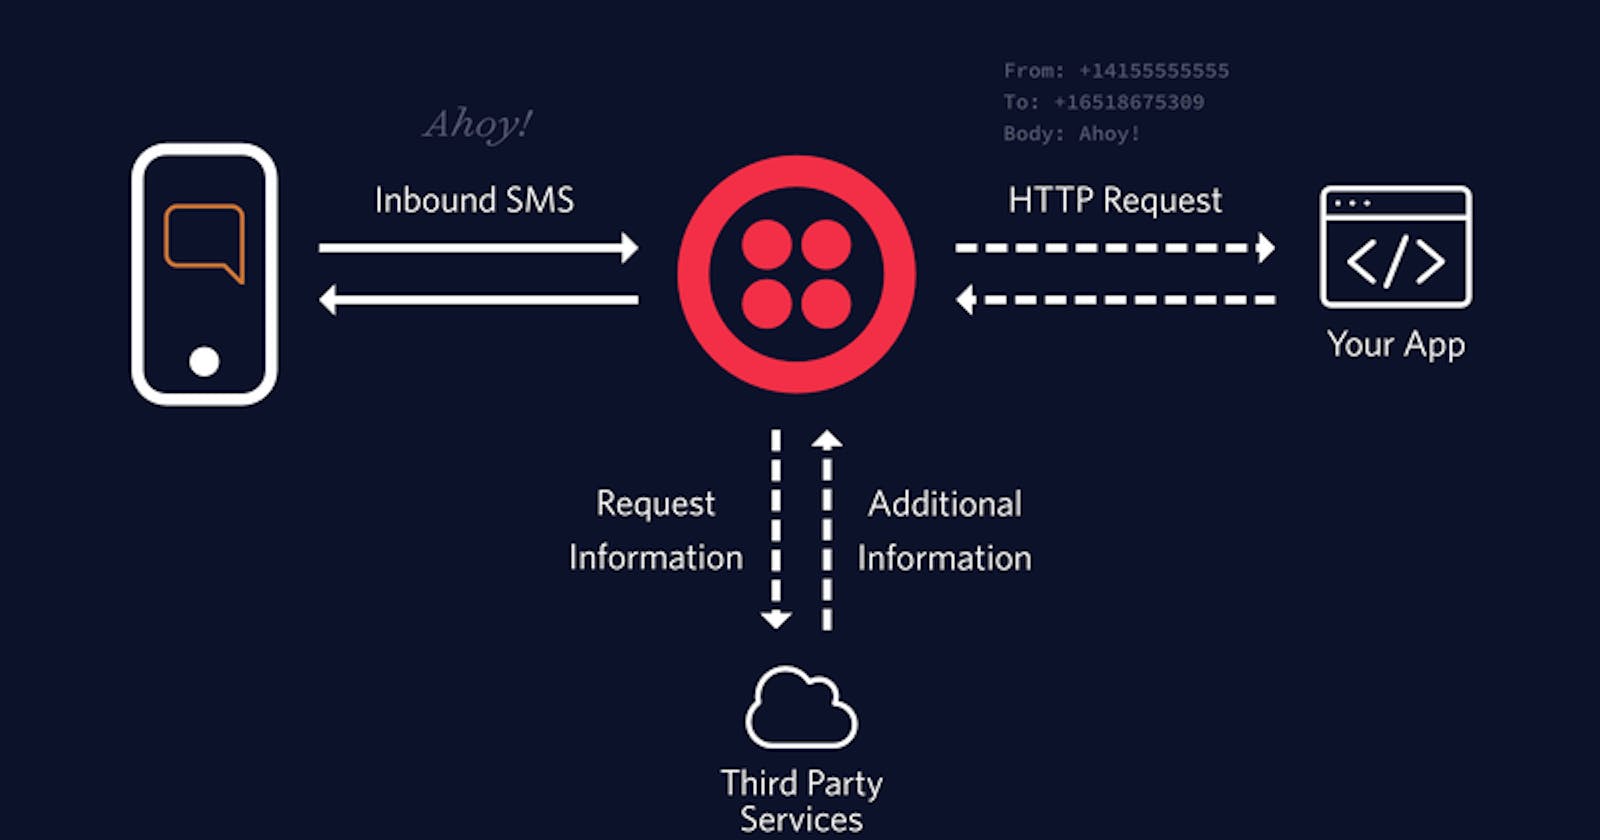


API (Application Programming Interface) is an intermediary software that builds a path for two applications/program to connect with each other (which includes sending and receiving data). In a simpler term, imagine entering into a restaurant, first of all, you will have to glance through the menu to choose what to order. Whatever food you ordered will be made in the kitchen. There must be a connection point between you and the kitchen so that your order can be delivered. The connection point can be made to understand what your order is and knows appropriately where to get it. That’s where the attendant or API comes in. The attendant is the linking – or API – that takes your order and tells the kitchen what to do to get your order served. Then the attendant delivers the response back to you; in this case, it is the food you ordered.
API's are very powerful and it can give you unlimited power as regards the number of functionalities you want to enable on your platform
Twilio is one of such API's. In this tutorial, I will walk you step by step on how to create a Python texting leveraging on Twilio API
Requirements
- Python – you can install Python here. If you’re using MAC, you should probably have python preinstalled. Ensure you install latest python although both Python 2 and Python 3 are supported by Twilio’s Python server-side SDK supports
- Twilio helper library- open your terminal to install using
pip install twilio. With the free twilio account you can only text numbers you have verified on Twilio platform.
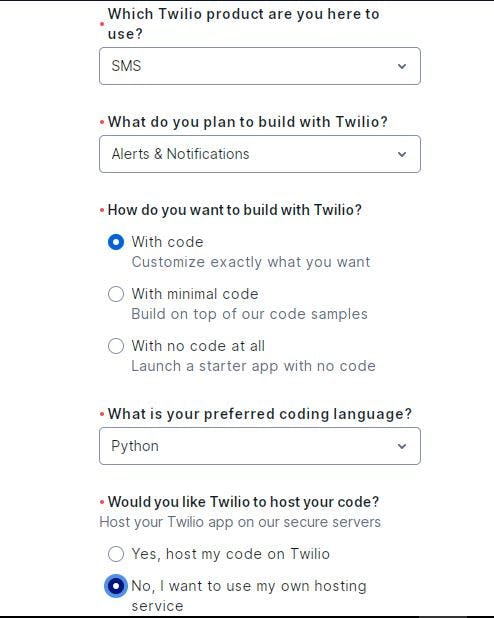
Step 1:- Create a Twillio account
Goto TWILIO to sign up for an account. Enter the required details into each of the boxes as shown below;
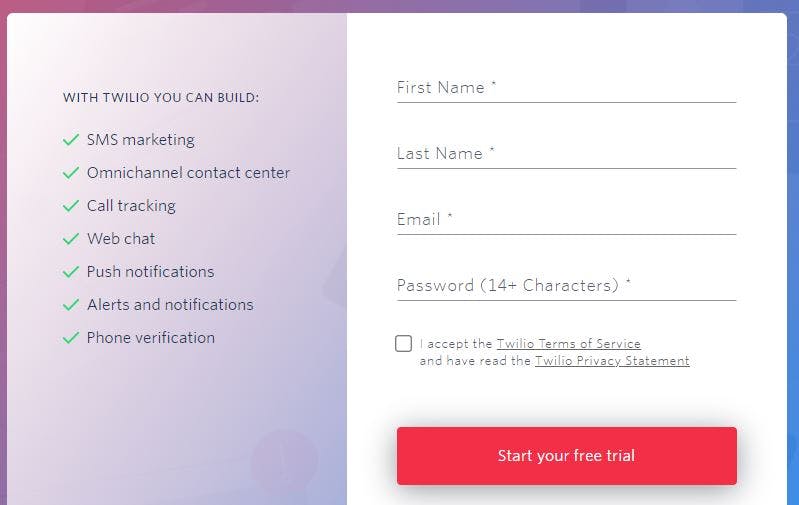
Click on Start your free account, you will be required to solve a puzzle, after which a verification mail will be sent to your email box.
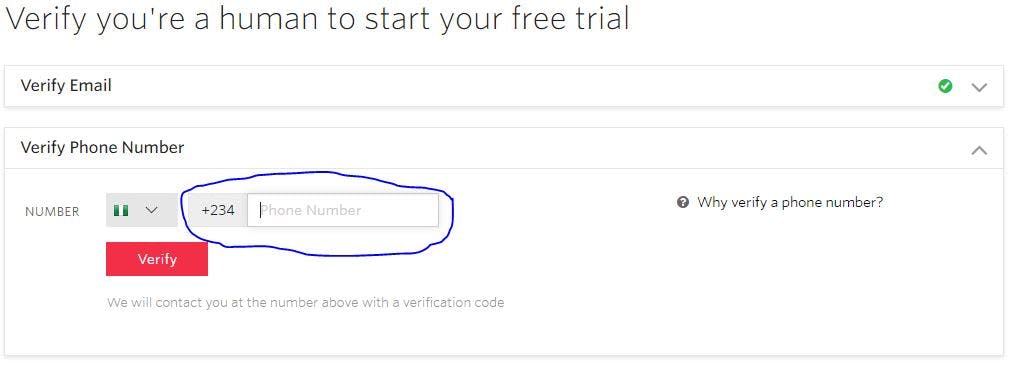
Step 2 :- Verify your phone number
When you click the link for email verification sent to your email inbox, you will be redirected to a landing page to verify your phone number. Messages can only be sent to a verified phone number on a trial account. Enter the verification code sent to your phone number after clicking the verify button to complete phone number verification.
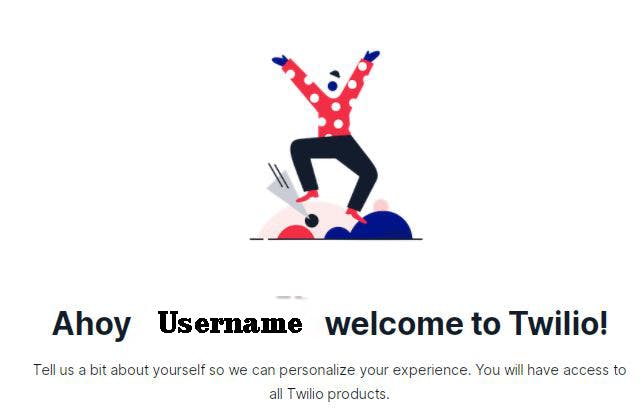
Is verification successful? Congratulations, personalize your account setting by filling up the following field under the congratulation message as shown below;
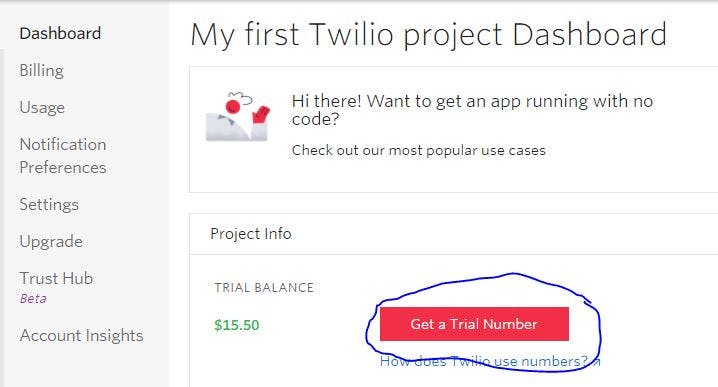
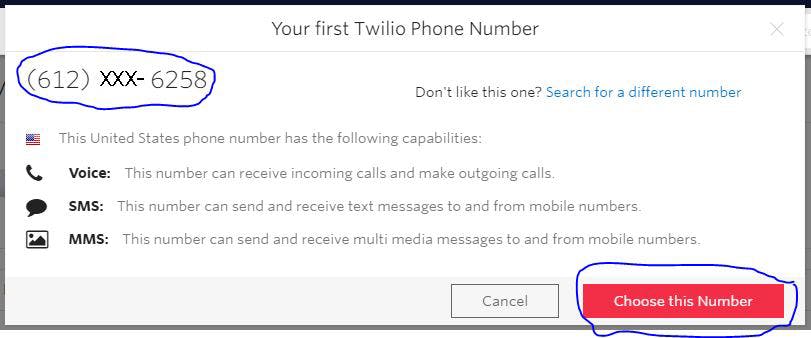
Step 3:- Get Your Twilio Phone number
On getting to the project dashboard in the Twilio Console click on Get Trial Number, a dialog box will pop up with a generated Twillio number for you, click on choose number as shown below;
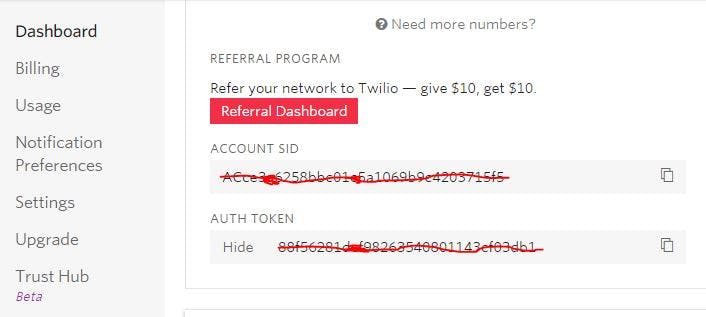
Step 4:- Get Twilio Credentials
On the dashboard, Get Account SID and Auth Token, both will be needed in your code.
Step 5:- Pip Install Twilio
Open terminal (Command Line Interface – CLI), run pip install twilio command to install Twilio Library;
pip install twilio
Step 6:- Input the code into code editor
Open code editor(VS Code, Pycharm, or IDLE) and enter the following lines of code and replace the required placeholders as explain below.
import os
from twilio.rest import Client


# Your Account Sid and Auth Token from twilio.com/console
# and set the environment variables. See http://twil.io/secure
account_sid = 'TWILIO_ACCOUNT_SID'
auth_token = 'TWILIO_AUTH_TOKEN'
client = Client(account_sid, auth_token)

message = client.messages \
                .create(
                     body="God bless Africa!.",
                     from_='TWILIO_PHONE_NUMBER',
                     to='VERIFIED_PHONE_NUMBER'

                 )

print(message.sid)
Replace all the credentials placeholder
Replace the placeholders for account_sid and auth_token with your personal Twilio credentials you copied under step 4. You can also Go to Twilio and log in to get your Account SID and Auth Token.
Replace the
TWILIO_PHONE_NUMBERwith your Twilio number gotten in Step 3.Replace the
VERIFIED_PHONE_NUMBER(Replace with your phone number verified in step 4). A trial account can only send messages to verified phone numbers. Although, it can be any mobile number that has been verified and that can receive SMS. But, It's advised you insert your personal number for a test and see the magic happens.Access Twilio Console's Verified Caller IDs to verify phone numbers. Also, the Short description “Sent from a Twilio trial account” included in your outgoing message automatically will be removed after you Upgrade your Twilio account.
You can choose to run the program inside the code editor. Alternatively, you can run it through the terminal (Command Prompt) through step 7 below;
Step 7:- Run the code through the terminal
Open the terminal (Command prompt), locate the directory where your code was saved, and run
python send_sms.py
In this case, my code file named send_sms.py was saved in the desktop directory.
Conclusion:- To build an SMS App with python using Twilio REST API, two things are most required to make this process successful, first is a twilio phone number that will be gotten after signing up on TWILIO, secondly, verified phone number (to be the recipient). Want to Upgrade your twilio account for a better offer, check out Account Upgrade
I hope you enjoy the article, your feedback and likes will be appreciated.
*You can access the code on my Github